
True RMS digital multimeter which measures AC/DC voltage, AC/DC current, resistance, capacitance, temperature and can be used for continuity, transistor and diode tests.
Availability in stock:
HK
ID: 891501 0.65 kg
Page Content
Many car enthusiasts face a problem with starting a car when its battery has run down. Typically, "symptoms" are as follows:
It the battery is drained, its work is adversely affected. However, it’s much worse if the situation occurs repeatedly. In this case, it is worth considering why your “iron horse” behaves in such a way. In fact, some of major causes are as follows:
First you need to check the battery. If you use it for more than 3-5 years, the battery is probably losing its ability to hold the charge. To check, disconnect battery terminals, leave it for 2-3 hours and check the voltage on contacts. You can use a regular multimeter for this; connect it to the battery connector while observing polarity (plus to plus, minus to minus). The optimal voltage value is 12.65 V, and minimum allowable voltage is 11.9 V.
Depending on the nature of the car's use, the battery may not be able to recover the charge when charging from the alternator. This may happen because of short car runs, idle time in traffic jams, as well as frequent engine startups and shutoffs. These factors affect the battery even more in the cold season.
If a vehicle has high mileage, the reason may be quite often the alternator failure. As a rule, an appropriate warning should appear on the dashboard, but sometimes we may not notice it. The starter may also be the reason, i.e., because of the rundown bearing or sleeve/bushing jam-up, it starts to take more power when turning. In such cases, you need to replace a spare part with a new one or make a recovery at a car service station.
If your testing has not discovered any of the issues listed above, you need to proceed to the next step - searching for leakage currents. There may be leakage currents because of the following:
First two issues can be determined visually, and to check the last one you will will need additional testing equipment. Again, you can use a regular multimeter or clamp meter.
Before you start testing, you need to undertake preparatory work. First of all, leave the hood open and turn off all current consumers, e.g., a car radio, exterior and interior lights, then remove the key from the ignition lock and close the door. Please remember that when you measure with a multimeter, the battery will be switching on and off, so the central lock may be triggered. It is therefore better to leave the windows open to secure access to the car.
To make measurements, we’ll need:
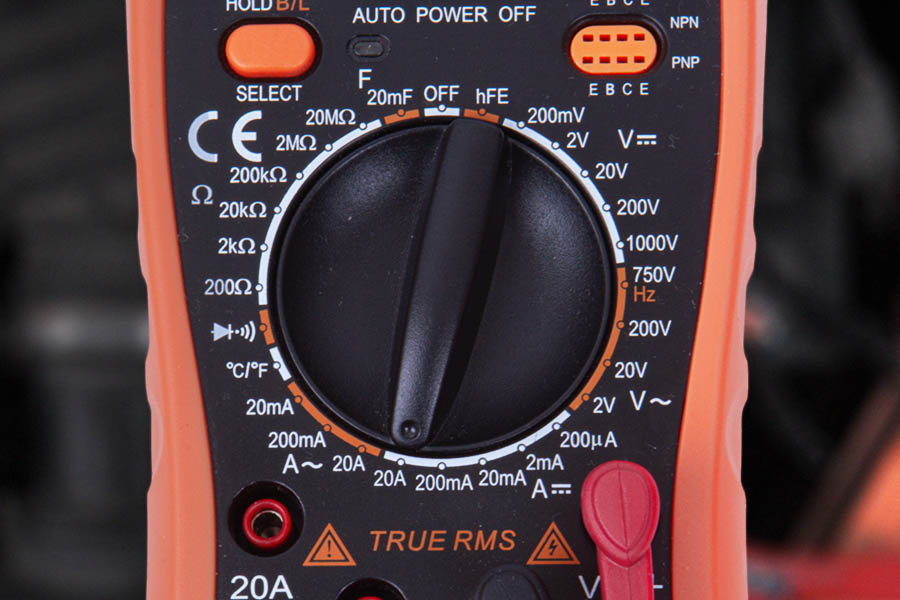 Switch the multimeter to the current measurement mode
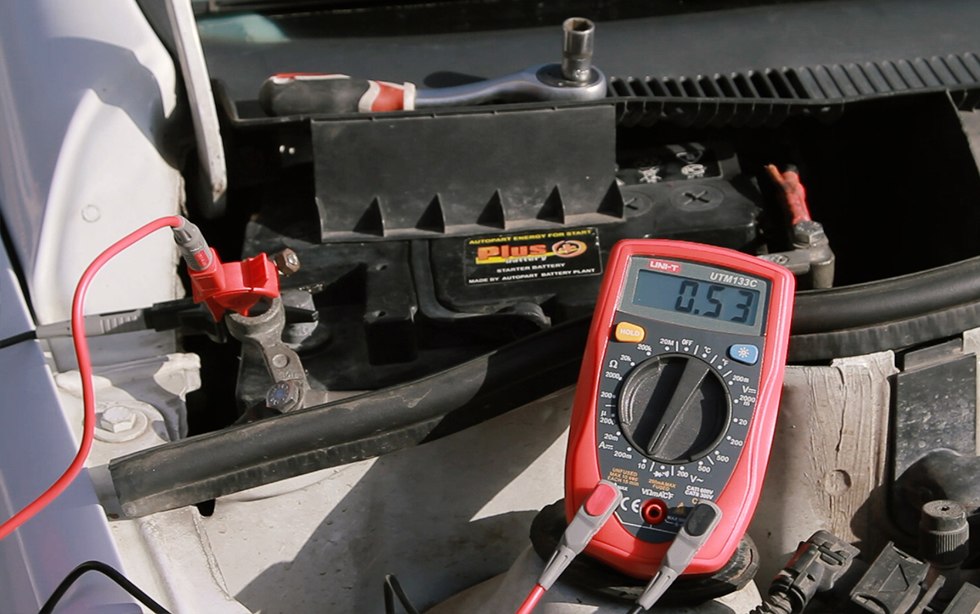
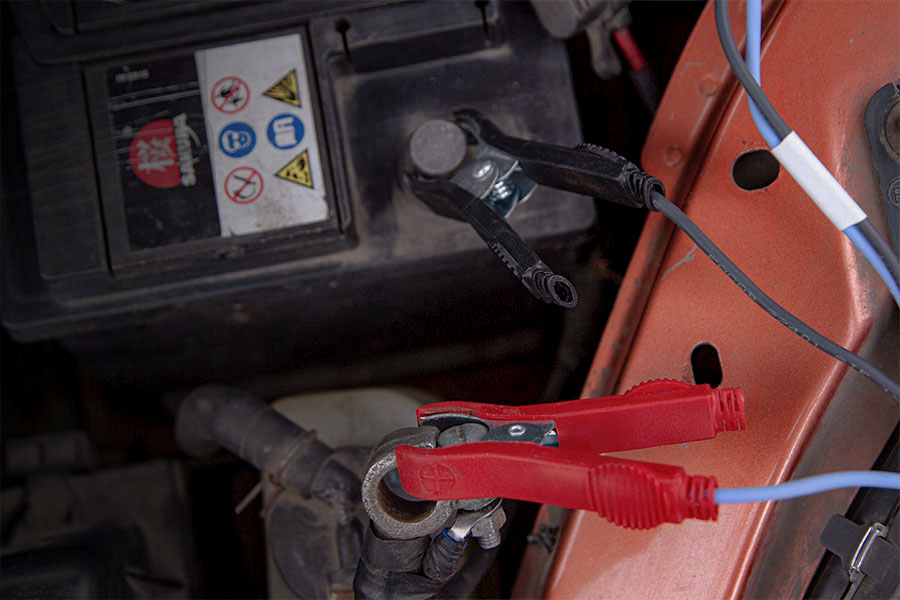 Disconnect the negative terminal from the battery. Connect one probe to the removed terminal, and the other - to the battery contact
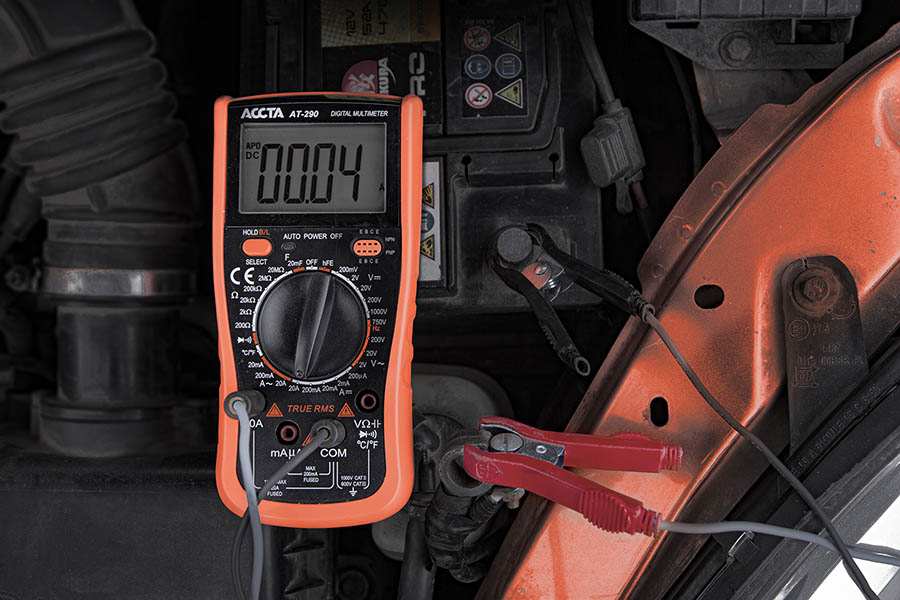 Check the leakage current value
It is quite convenient to measure leakage current clamp meters – no need to disconnect anything, just crimp the wire and make measurements. Clamp meters’ disadvantage is that they are not too precise and can capture parasitic currents. Still, by resetting with the "Zero" button you can achieve accurate and precise results.
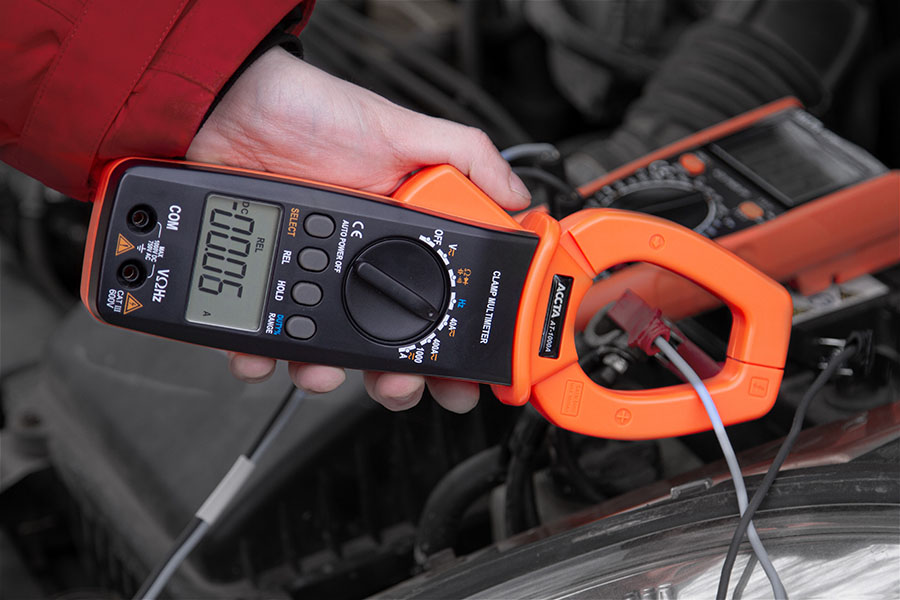
You need to crimp either a positive or a negative cable with all the wires connected to one of the terminals (if any). The only important point is that clamp meters should measure DC current. As a rule, their price is much higher if compared to regular clamp meters that measure only AC.
Acceptable limits of leakage current - 20-80 mA. Typically, current consumption for OEM devices is as follows:
The most popular aftermarket devices include the aftermarket acoustic system (car radio, amplifiers) and the alarm system. There may also be some leakage current through such consumers as a dashboard camera and a GPS navigator connected via the cigarette lighter socket. The fact is that in some cars the cigarette lighter is powered regardless of the ignition lock. Quite often, leakage current occurs when there is the luggage compartment light contact switch short-circuiting, which results in the lamp being constantly on.
Immediately after we connect the multimeter, the leakage current value can exceed permissible limits. Don’t panic immediately – by connecting a multimeter to the break, we actually close the circuit and provide power to devices. Depending on the vehicle, it takes some time for it to go back to the idle mode (from 1 to 20 minutes).
 The leakage current value
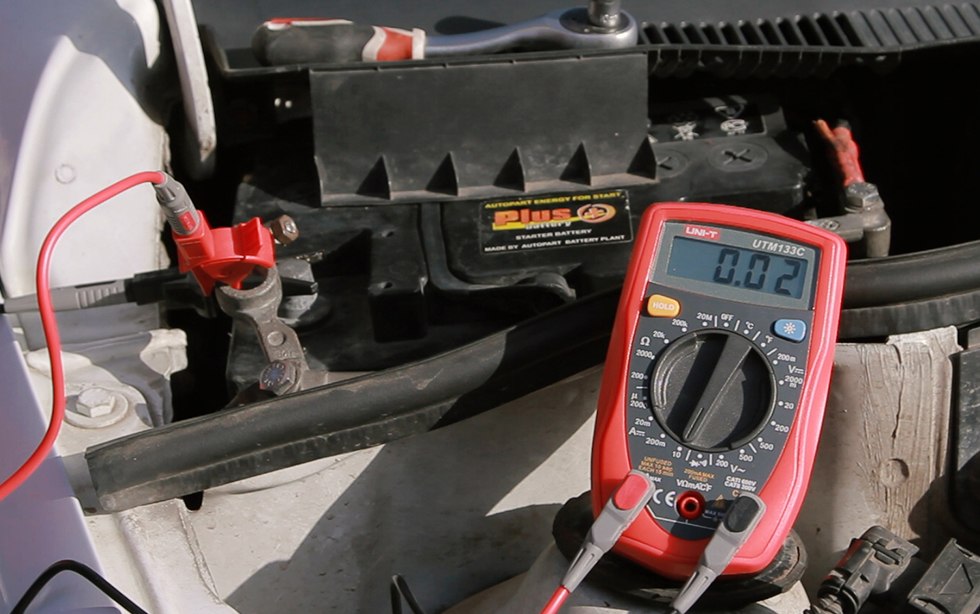 The leakage current value
If, however, the current value doesn’t decrease, we proceed to the next stage – testing the fuse panel and relay.
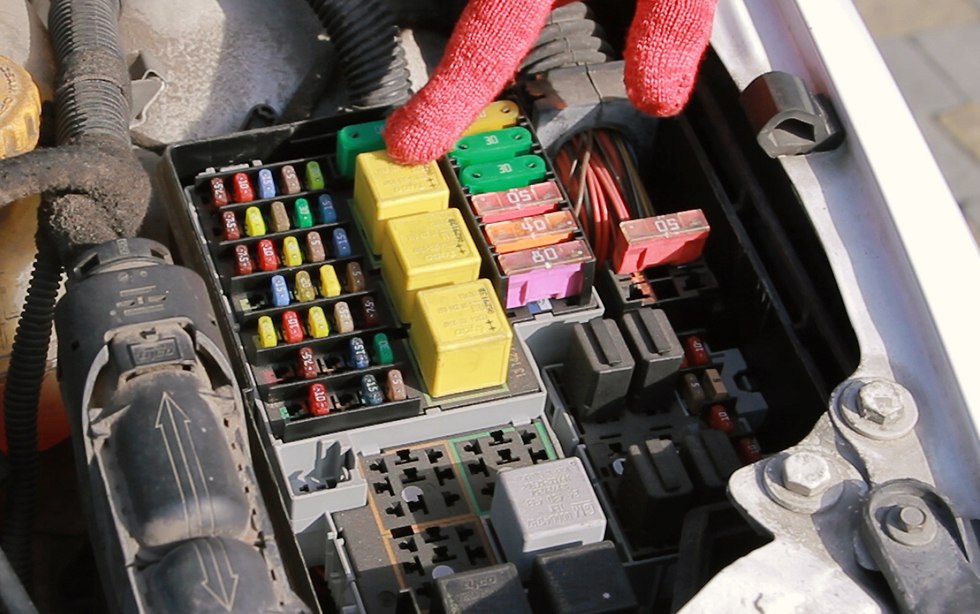
The fuse service box and relay box are located under the hood. It is also possible to place another block (box) in the passenger compartment near the dashboard, under the rear seat, and also in the boot. We can search for a potential consumer of excess current in the following way:
Imagine you’ve checked all fuses, but there is still leakage current.
In this case, you need to check the devices not protected by fuses. These are:
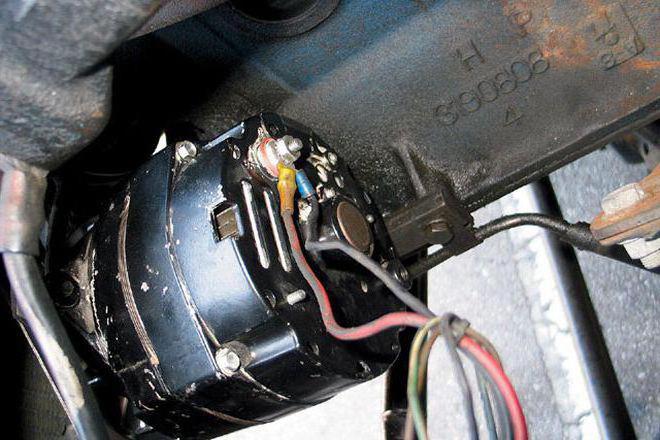
One of the main reasons why the alternator consumes current is typically a failure of power rectifier diodes (the diode bridge). This negatively affects the battery when the car is both idle and moving. When idle, there is parasitic current consumption, and when moving (or just when the engine is running), the current produced by the alternator doesn’t charge the battery (in part or in full). To check alternator leakage currents, you first need to disconnect the battery from the vehicle network (you can remove the negative terminal).
Then disconnect two power wires from the alternator and connect them safely together. Depending on the connector type, you can use a bolt and nut of the appropriate diameter for the connection. Also, you need to insulate the connection with dielectric. For this purpose, a usual insulation tape is OK. Now connect our multimeter to the car network in the current measurement mode and observe indicators:
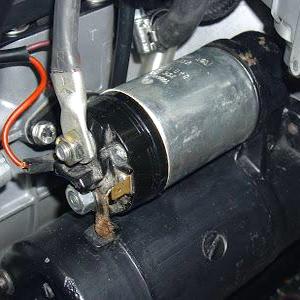
Let’s put it straight: there is no leakage current in the starter. We have a slightly different concept here - an increasing value of the starter crank current, and consequently not enough battery current to start the car engine. This may be also caused by the wrong battery capacity (the battery was incorrectly selected). However, if everything is OK, then you need to measure the crank current of your vehicle. For this purpose, you will need a clamp meter.
You can do the initial check of the alternator and starter yourself if you have a multimeter and clamp meter. However, it is better to do repairs or replacement at a car service station.
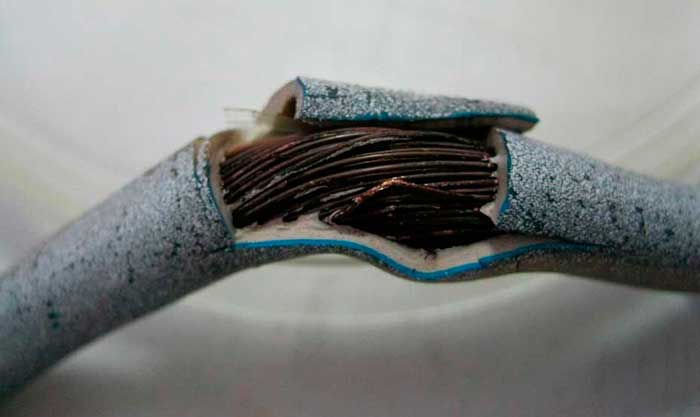
You can quite often see that you have found the problem line of current consumption when trying to find leakage current, while all devices connected to it are working properly. This may be caused by damaged wiring. You may detect faulty wiring if you test it with a multimeter in resistance measurement mode. As a rule, factory wiring is laid so that violation of its integrity is possible only because of an accident or intentional damage. Therefore, you should seek the source of leakage currents first by checking the wiring of aftermarket devices.
If you are having trouble starting a vehicle because of battery problems, don’t put away searching for its cause for later. Excessive leakage currents are slowly killing your battery – slowly but steadily though. Besides, wiring problems can cause short circuits and fires in the vehicle. It will be cheaper to carry out timely testing yourself or take the car to a car service station for check.
Our video review shows the procedure of finding leakage currents in a vehicle:

Our online store offers a wide range of multimeters, clamp meters and jump starters that will help you. If you have questions about selecting equipment or need any additional consultation, don’t hesite to contact us, we will be happy to help.