
31.07.2023
A cleaver is a mechanical precision device whose task is to cleave the end of an optical fiber so that the cleavage surface was as flat as possible and if possible at 90° angle to the fiber itself. However, there are specialized cleavers and cleavers with electronics that allow making cleavage angles different from 90°.
The quality of a cleaver is determined by the following statistical parameters: how smooth the cleave is, how the angle of the cleavage surface is different from 90°, how often the cleaver breaks fibers, how convenient it is to work with it, what the cleaver’s capacity is, etc.
If we just break off the end of the fiber with tweezers, then the probability of having a proper cleave will be extremely small and fusion splicing will definitely not be good. A couple of examples of bad cleaves are listed below.
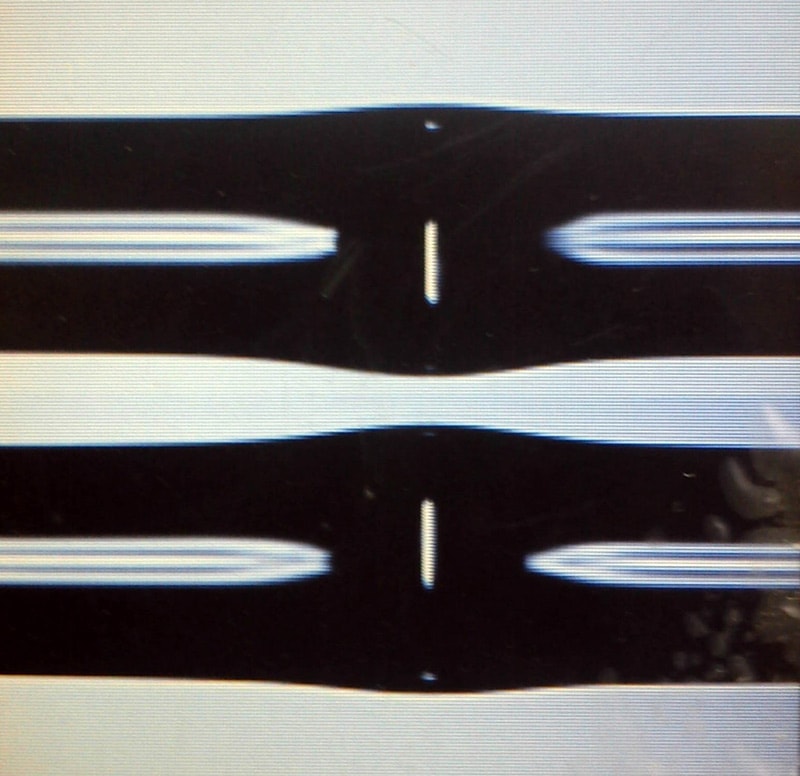
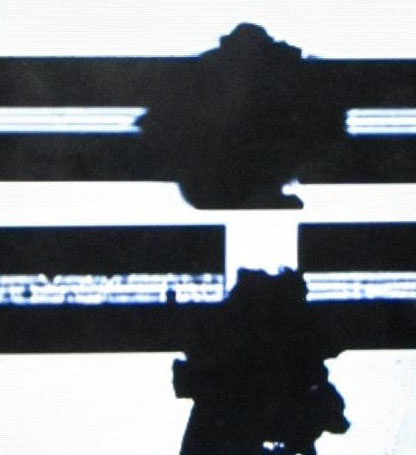
 A poor cleave on the fusion splicer display (view of the same fiber with two cameras)
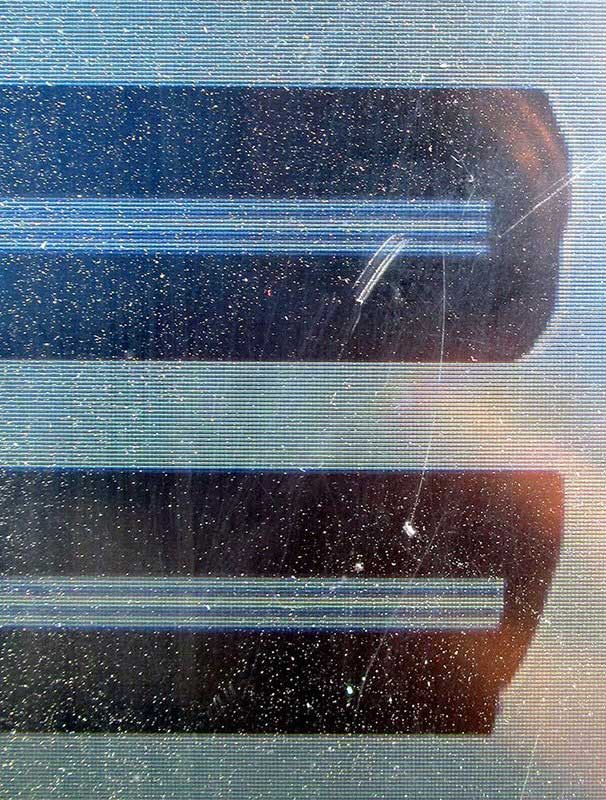
 Left fiber with a poor cleave, right fiber is normal (a small black defect on the right fiber is frequent occurrence; it doesn’t usually affect splice, since it is located on the edge of the fiber)
The splice itself will look like this (if you still “force” the fusion splicer to fuse – despite its "protests").
 A poor cleave on the fusion splicer display (view of the same fiber with two cameras)
A typical "bubble". Splice needs to be fused again. A line with this splice will not work. In a best-case scenario, the line will work – with a bunch of packet loss - if it is short, but the attenuation here will be a few decibels.
Therefore, you will need a special tool to gently prepare fibers for splicing.
Precision cleavers, as well as fusion splicers, differ. They can be more expensive, less expensive, much less expensive, or they can be even limited purpose devices. If you can compromise on the point of a fusion splicer and save 200–250 USD when buying a good Chinese device instead of a Japanese one, it's better, however, not to do it with a cleaver. Yes, you are right: in addition to buying a Chinese set of a fusion splicer with a Chinese precision cleaver in the package, I advise you to additionally buy a good Japanese cleaver, and use the Chinese cleaver as a backup (or as an additional tool – to speed up the work). A good cleave is already 50% of successful splice, while speed and convenience in operation is the best guarantee that the operator will be able to fuse more fibers in a day.
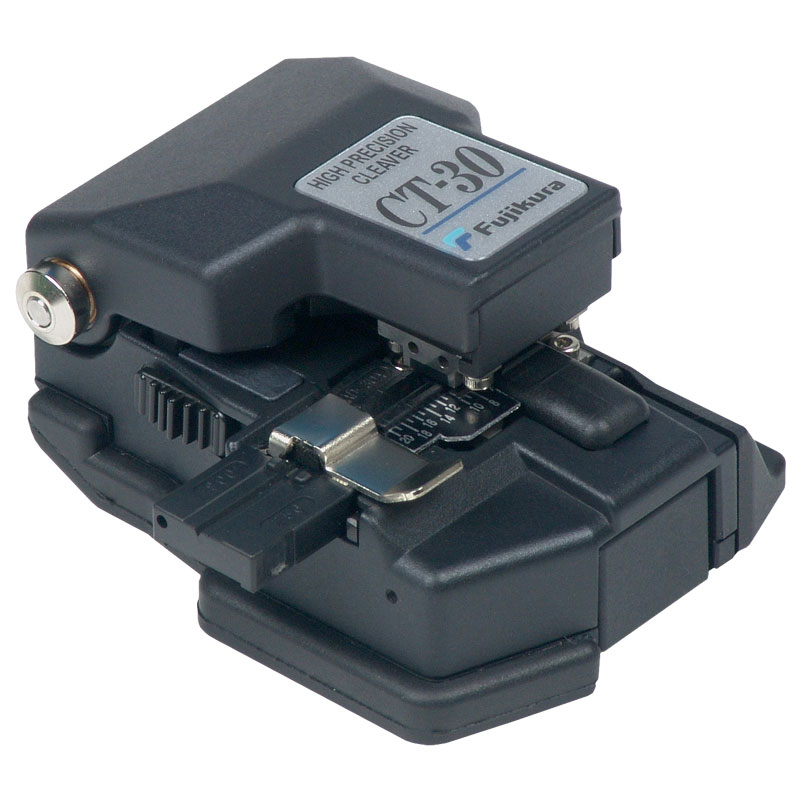 Fujikura CT-30
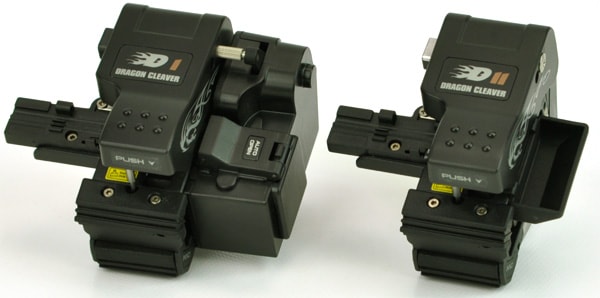 INNO Dragon
Let us describe the algorithm of the cleaver operation using Fujikura CT-30 / Fujikura CT-30A as an example.
Quite a lot of operators have this model. It is a really good, thoughtful and convenient device. The instrument is compact and reliable, you can cleave with it using minimum movements, and there won’t be any unpleasant surprises. Remember that you need to use a cleaver having a collector for cleaved fibers. There are other models of Fujikura cleavers, which are positioned as a more modern, compact and inexpensive replacement for CT-30A, but never as a higher-quality replacement. Still CT-30A is a classic.
When using CT-30A, you will need to:
With some cleavers, even less action is needed: you don’t even need to lift the carriage, because it is lifted when the cover (latch) opens and produces a working pass when it is closed.
If we talk about the sequence of actions in a simpler and less expensive cleaver using the example of Jilong KL-280, then you need to conduct more operations for the cleave.
It would seem that there are only two additional actions. However, it affects ergonomics, time, the amount of work done, which will be bigger if all operations are performed quickly.
Next, this precision cleaver sometimes breaks fibers, and cleaning or scavenging does not help much. You can cleave fibers OK for twenty times; then the 21st time is when you take out the fiber and it is broken by the cleaver in one of its "favorite" places: before or after the rubber pad, or between the pad and the blade. You need to strip it again and wipe with alcohol.
The capacity of a 16-position circular knife by the Chinese precision cleaver is quite small: you need to turn to the next position quite often (in comparison with Fujikura), otherwise it will start cleaving poorly. When the knife has done a full turn, its corresponding adjusting screw is lifted some microns and it does the second full turn again. After that, the second lift and the third turn, and then the knife should be replaced.
The full capacity of a good Japanese precision cleaver is around 48.000 cleaves.
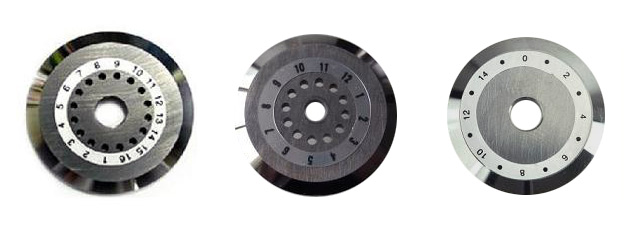 Circular knives for all sorts of cleavers
There are other cleavers. For example, a cheap pin-shaped “sorry excuse of” a cleaver that does not show accurate perpendicularity of the cleavage and which I would not advise to use at all.
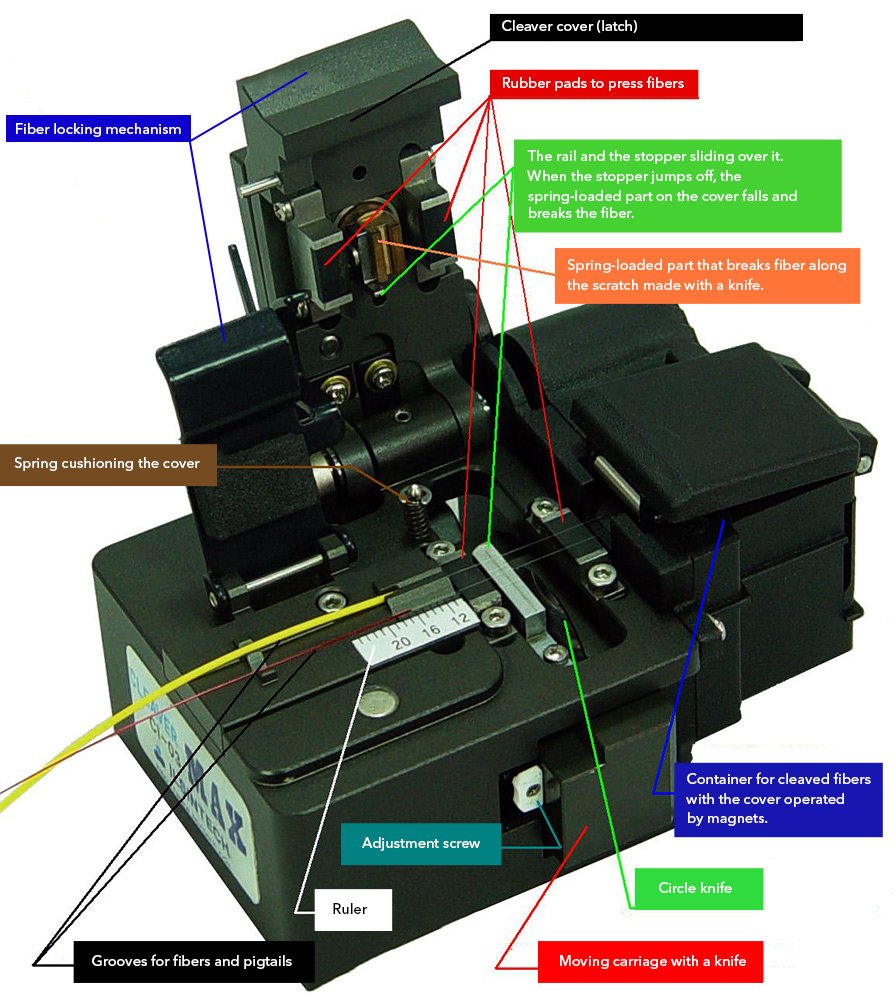
The principle of the cleaver operation is as follows:
Let us consider in more detail the cleavage of one fiber with a typical precision cleaver.
 Fibers are dirty; besides, a large particle of dust is stuck against the fiber
Pieces of optical fiber, especially fiber without varnish, are a dangerous waste product. In countries with a better culture of waste processing, they are collected and disposed of. In our country, of course, it depends, but still this is not a reason for throwing fibers around after your work. All fiber fragments must be carefully collected! If such a piece of fiber, a barely noticeable, gets into food or into your drink, it can lead to problems like ulcer or the like problems. If it sticks into the body and breaks there, then in theory, this piece can reach your heart travelling via the blood-vascular system; however, it usually becomes a nasty – difficult –splinter no x-ray can find, which crumbles when you try to pull it out with tweezers. In addition, fibers in clothes, shoes or in car seats are not the most pleasant things to have. Thus, you should follow the rules below:
Back to our sheep or back to our cleavers.
You understand that a successful cleave depends on microns. Therefore, the cleaver should be protected from blows, falls, dirt and “all thumbs” operators as fervently as the fusion splicer. It is not accident that the device is packed in a soft-filled box.
You cannot screw tuning pegs, not being exactly sure what you are doing. You cannot fumble inside with your hands or solid objects – you can cut yourself and ruin the blade sharpening. You cannot leave the cleaver in a humid environment for a long time.
You just need to remember: a fusion splice, a cleaver and a reflectometer are three irreplaceable tools. Your work will stop if you don’t have any of them. Yes, you can actually cut or terminate the cable with an ordinary knife instead of the NIM-25 tool. Yes, you can remove the lacquer from the fiber with a razor instead of a stripper. However, making a proper cleave with impromptu means is unrealistic and fusing fibers with materials on hand is impossible.
