
31.07.2023
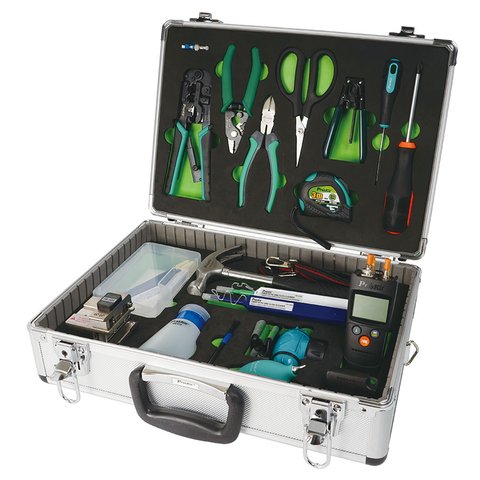
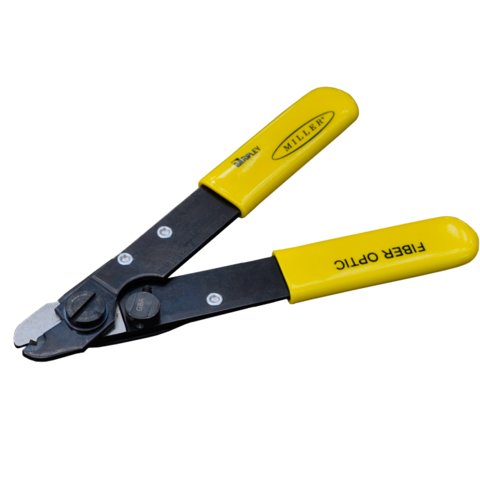
For optical fiber punch down, as well as for splicing, a number of specific tools are needed. A typical set for an installation fitter and cable jointer is a case with Pro'sKit PK-9458 tools; it contains all necessary strippers, screwdrivers, side cutters, scissors for Kevlar and other tools, as well as a pump or bottle for alcohol. To have a complete set of necessary tools, you should also buy a stock of solvent for hydrophobic "D-Gel", non-woven lint-free napkins, harness tape, self-adhesive markers-digits for cables and modules, and other consumables.
When preparing (dressing) cables, it is important to keep the lengths of cable elements in accordance with the requirements in the instructions for the cable joint. For example, you may need to leave a long central element to secure it in the cable joint / cross in some cases, while in other cases it is not required. Also, a Kevlar cable may be sometimes braided and clamped under the screw, while in the other cases the Kevlar is cut off. It all depends on the cable joint and the cable.
Let’s consider how most typical cables are dressed:
1) Before dressing a cable that was exposed to moisture for a long time or that doesn’t have a waterproof end surface, you should cut approximately one meter of the cable with a hacksaw (if you have enough cable). The fact is that the optical fiber is adversely affected by a prolonged exposure to moisture (it may become dim), and so are other cable elements. Kevlar fibers in the cable are an excellent capillary that can absorb water and "pump" it into the cable for dozens of meters, which may be fraught with problems. For example, if high voltage wires go in parallel with the cable, the wet Kevlar can start conducting current due to the water absorbed, water evaporates and crushes the outer cladding from within, and the cable starts to get bubbles on it, through which new moisture gets into the cable from rains.
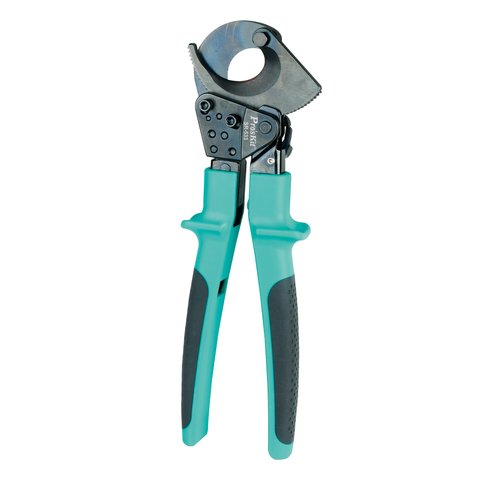
2) If there is a separate suspension cable in the cable structure (i.e., it forms a figure eight in the cross section, where the cable is in the lower part and the cable cord in the upper part), then the cable is cut by the wire rope cutter and sheared with a knife. When shearing the rope, it is important to avoid the cable being damaged.
3) To remove the cable outer cladding, use the appropriate DVP-10ZH stripper as in the photo below or a stripper for electric cables.
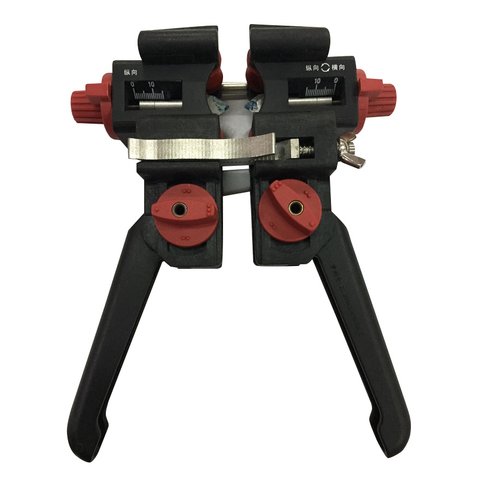
Such a stripper has a blade that rotates in all directions, and which can be adjusted along the length according to the cable sheath thickness, and a clamping device to be held on the cable. Important: if you have to cut cables of different brands, then before cutting a new cable you need to try the tip of the knife: if you have cut too deep with it and damaged the modules, you should choose a shorter blade. Otherwise, the stripper may shave the module and break a fiber when you cut the cable. In this case, the broken fiber will suddenly "jump out" of the cable when fibers are being laid. It could not be worse: the cable joint is already spliced, and all work comes to nothing.
Make a circular cut on the cable with a stripper to remove the outer cladding; then make two parallel cuts on the opposite sides of the cable from the circular cut towards the cable end, so that the outer cladding breaks up into two halves.
It is important to properly set the blade length of the stripper. The outer cladding won’t be easily split into two halves if the blade is too short. Then you will have to be ripping it off with pliers for a long time. On the other hand, if the blade is too long, you can damage the modules deep inside the cable or blunt the rotating blade against the armor.
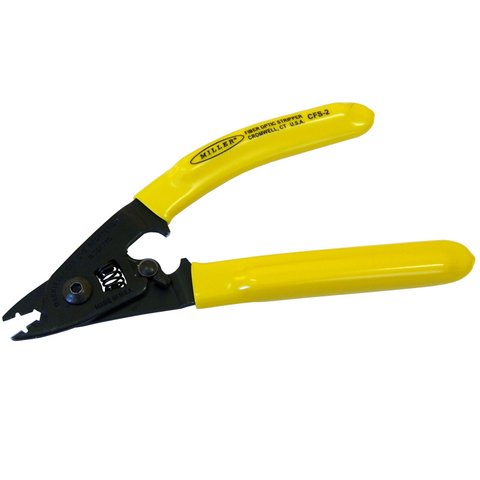
4) If you use a self-carrying cable with Kevlar, Kevlar is cut off by cutters or scissors with special ceramic blades.
Kevlar quickly blunts metal cutting tools, so it should not be cut with a knife or with regular scissors (without ceramic inserts on the blades). Depending on the cable joint design, it may be necessary to leave part of Kevlar of a certain length for fixation; it will be mentioned in the cable joint installation instructions.
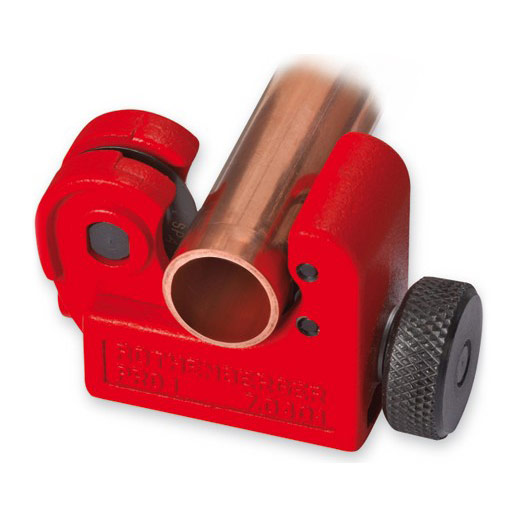
If a cable is intended to be laid in the telephone conduit and has only corrugated metal as armor (so that rats didn’t gnaw through), it can be cut longitudinally with a special tool (reinforced electrical knife). Alternatively, carefully make a circular scribe line on the corrugated metal with a small pipe cutter or even with an ordinary knife. Then slightly jolt it, increasing the fatigue of metal in the place of the scribe line, which will make a crack. After that, you can partly remove the corrugated metal, cut off modules with pliers and pull together the corrugated metal. This dressing or cutting should be done with extreme caution, as it's easy to damage modules and fibers: the corrugation is not too strong; it can crease in places where you scratch it about with tools; moreover, when being pulled from fibers, sharp edges in the fracture can cut through the modules and damage the fibers. Cables with corrugated metal are not most convenient for cutting.
If the cable is armored with round wires, they should be cut off with rope cutters in small batches, 2-4 wires each. If you use side-cutting pliers, the procedure is longer and harder, especially if the wire is steely. For some cable joints, a certain length of armor is required for fixation; also the armor (including corrugated) often needs to be grounded.
5) For the inner, thinner cladding that some cables have (for example, in self-carrying cables with Kevlar), you should use a separate, pre-configured stripper knife (it can be the same as the one for removing the cable outer sheath), so as not to disrupt the knife length settings every time you cut the cable. In this case, it is especially important to correctly set the length of the blade in the stripper; the blade will be shorter than in the stripper used to remove the outer cable cladding, since the inner cladding is much thinner and has modules with fibers immediately underneath. With enough skills, you can use a conventional craft knife to remove the inner cladding, making a cut through, but there is a significant risk of damaging cable modules. You can also use a cable-stripping tool for coaxial cables.
6) Threads, plastic film and other auxiliary elements are removed from cable modules with napkins and D-Gel/gasoline. Threads can be twisted one by one; they can be ripped off with a special sharp hook (included into some strippers for removing the cladding). To remove the hydrophobic gel, gasoline or D-Gel solvent (a toxic colorless oily liquid with the orange flavor) is used. However, you should be careful with gasoline: office staff will not be happy with the aroma when having gasoline at their side. And yes, it is flammable.
You should work in disposable gloves (surgical, polyethylene or building) since the hydrophobic gel is very ugly stuff (the ugliest stuff in the work of a cable jointer!). First, it is difficult to come off – for some time, hands stay oily after being exposed to gasoline or hydrophobic gel; remember that you need clean hands and tidy workplace when splicing the cable. Second, in winter, hands with hydrophobic gel on them get very chilly. However, when you get skilled, you can cut cables almost without soiling your hands.
After removing filaments and dividing the tube harness into separate modules, each module is wiped with cloths / rags with D-Gel / gasoline solvent on them, and then with alcohol – until clean. In order to save time and to get less dirty, you can proceed in the following way. (1) Do not divide all cable into modules. (2) Take the part where you started cutting, do not wipe anything, and cut modules (see number f) through around 30 centimeters, (3) pull off the fibers all module harness with reeling and threads, holding the clean end of the cable in your hand like a handle. Hands remain almost clean, and time is saved. However, with this method of cutting, there is a risk of breaking some of the fibers or applying excessive tensile force to fibers, which will adversely affect fiber attenuation in the future, and you are more likely to damage the modules, so this method is not recommended, especially in winter when the hydrophobic gel thickens. First, you need to learn how to do it right, and then try different optimizations.
7) At the required length, each module (except for dummy modules, which are cut up completely, but you first need to make sure that they really do not have fibers) is cut with the stripper for the modules (cutter for copper coaxial can also be used), after which the module can be pulled off fibers without much effort.
Stripping modules with a stripper is a very important issue. It is necessary to choose a cut-off of the exact diameter; if a cut-off is larger than necessary, the module will not be cut enough to be easily removed; if it is too little there is a risk of cutting a fiber in the module. In addition, you should carefully monitor the stripper fixator. If it blocks the stripper reverse motion when you cut the module, and fixes it in a "closed" state, then you will have to close the tool on the cut module again in order to open the stripper and the fixator; at the same time there is high probability that you will cut a module, which will result in the need to re-dress the cable. Remember that when cutting one of the modules, other modules are actively interfering, and you must hold them with the other hand; moreover, the cable itself must be held in some way as well. Therefore, first it will be very inconvenient and you should cut the cable with someone else.
There are cable designs only one module, which looks like a rigid plastic tube in the center of the cable. For a high-quality removal of such a module, it should be circularly cut by a small pipe cutter, and then gently broken in the place of the circular notch.
When tightening modules, make sure that all fibers are intact and that no fiber remains sticking out of the tightened module.
When cutting the cable, you should pay attention to the length of fibers. It should be no less than specified in the instructions, usually it is 1.5-2 meters. Actually, you can cut even at 15 cm length and then you can even splice somehow, but then big problems will arise when laying fibers in the optic fiber organizer. A large supply of fibers is needed just to have “room for maneuver” when laying the cable so that you can choose the appropriate length and lay all fibers in the optic fiber organizer in a nicely fashion.
It sometimes becomes necessary to splice into the transit cable without cutting it. In this case, it is cut to modules, just like the usual one, but there are higher requirements for being cautious while cutting: the cable can already be connected. It is cut to modules and the modules are neatly inserted into the "oval" lead-in of the cable joint (they will not come into the usual round lead-in because they will break); this lead-in uses a special set of heat shrinkage and metal clips with a hot-melt glue block. This glue, when shrunk due to high temperature, melts and fills up the space between two cables, ensuring tight seal. Further, the module into which it needs to be spliced in is cut, those fibers from the module that should not be spliced off are spliced back through transit, and those that we need are spliced to the derivation cable. There can be a rare situation where we need to take a fiber out of the module, but we cannot cut the module (there is an important connection in it). Then we use a set for longitudinal cutting of modules: from the module, the "chamfer" is longitudinally removed, the fibers are extracted from it, wiped from the hydrophobic gel and sorted. The fibers we need are cut and spliced on another cable according to the diagram, and the rest are simply laid into the optic fiber organizer. In this case, if there is uncut cable, the fibers length should be twice as large (2-3 m), which is understandable.
Fibers must be clean (thoroughly wiped off from the hydrophobic gel); you need to make sure that all fibers are intact. Fibers require careful handling. When you find out that a fiber has broken at the cable end after cables have been cut & wound up and the splicing is almost complete, you will have to re-dress the cable and splice it again, which will take a lot of time and is extremely undesirable and loss-making when prompt restoration of communication on the existing backbone is needed.
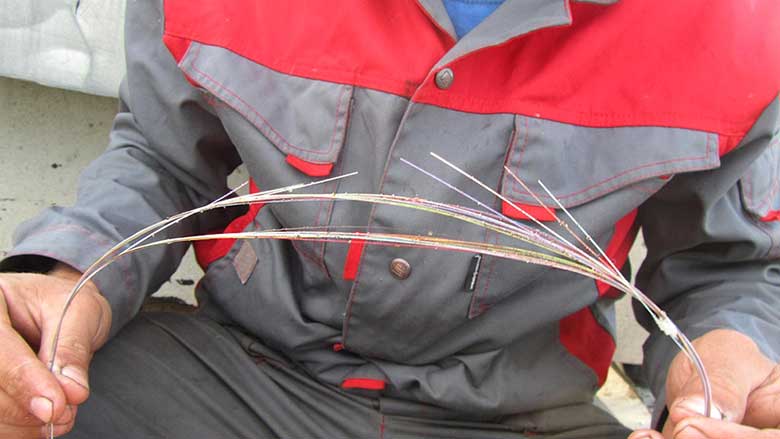 Optical fibers damaged by negligent cable cutting (the length of the stripper blade was incorrectly set when removing the cable's inner coating, which led to the modules being cut through and some fibers being damaged)
8) Fibers should be wiped with lint-free cloth/napkins with alcohol to completely remove the hydrophobic gel. First, the fibers are wiped with a dry napkin, and then – with napkins soaked in isopropyl or ethanol. Do it in this order – there will be a huge bit of hydrophobic gel on the first napkin (so alcohol is not needed here), while on the 4th and 5th napkin you can use alcohol, so that it dissolves the remains of hydrophobic gel. Alcohol evaporates quickly from the fibers.
The purity of fibers, especially closer to the ends, is of great importance for high-quality splicing. When you work on the micron level, dirt and dust are unacceptable. Fibers should be inspected for integrity of varnish coating, the absence of dirt, and any broken parts of fibers. If the varnish on any fiber is damaged, but has not yet broken, it's better not to risk and re-strip the cable. Spend 10-15 minutes, otherwise you risk spending the whole day.
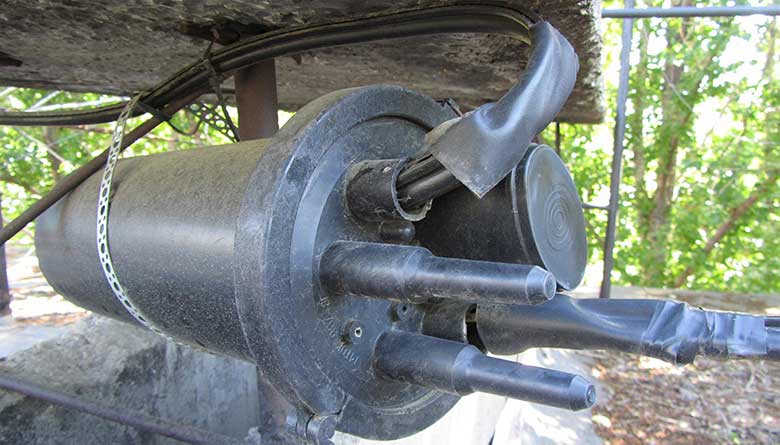
9) Special glue heat shrink sleeves are worn on the cables that are cut off/terminated, which are often included in the cable joint kit (if the cable joint has a bushing sleeve for the cable). If the cable joint provides clamping of the cable in raw rubber with a sealant, then heat shrinkage is not needed. A very common and very unpleasant mistake of a novice is to forget to use heat shrinkage! When the cable joint is spliced, the heat shrinkage is pushed onto the sleeve of the cable joint and is shrunk with a gas burner, heating lamp or industrial hot air gun, providing a hermetic cable entry into the cable joint and additional fixation for the cable. It is most practical to sit down with a small burner, which is put on a tourist gas spray can with a split terminal: one can is enough for dozens of spliced cable joints, it just easily lighted as opposed to a blow lamp, weighs little, and you don’t depend on electricity as opposed to an industrial hot air gun.
Before shrinkage, the cable joint bushing sleeve and the cable itself should be sanded with a rough emery cloth for better glue adhesion. If this is ignored, the following bug can occur:
If heat shrinkage has been left out, a heat-shrink sleeve with lock will help (known as XAGA).
Some heat shrinkage (for example, those by the Raychem company) are covered with dots of green paint, which turns black when heated, indicating that one place is no longer necessary to heat, while the other one should be warmed up. This is done because the heat shrinkage can burst if it is overheated in some place.
You can relax a little only after the cable joint is spliced. If a trouble occurs during splicing (for example, a fiber breaks and you have to re-dress the cable), then you will not have to scratch and pick with a knife the frozen thick adhesive heat shrinking, and the heat shrinking itself will not be wasted.
10) The finished cables are inserted into a cable joint or cross, fixed, and the cabling joint itself or the cross is fixed on the desktop. When fixing the cable in a cable joint or in a cross, follow the installation instructions – for different cable joints there are different instructions. In some cases, fixing the cable in the cable joint is a separate – complicated – operation with cutting the armor, winding the sealant, etc.
